Hey guys!
If you are looking to add a 1099 vendor into QuickBooks (Online and Desktop) and track time for them, you’re in the right place!
Before we begin, let me start by explaining what a 1099 vendor is.
According to the website, Accounting Tools, “A 1099 vendor is a designation listed in each of the records in the vendor master file that is part of an accounting software package.” By the end of the year, the system prints a Form 1099 that suppliers will use for tax purposes.
“The intent of the 1099 vendor designation is to ensure that suppliers report the correct amount of income to the IRS for income tax reporting purposes,” explains the blog mentioned above.
With that cleared out, let’s begin!
How to enter a 1099 vendor in QuickBooks Online:
1. Login to your QuickBooks account.
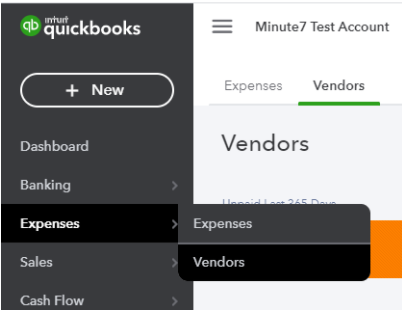
2. Click on “Expenses” and then on “vendors.”
3. Click on “new vendor.”
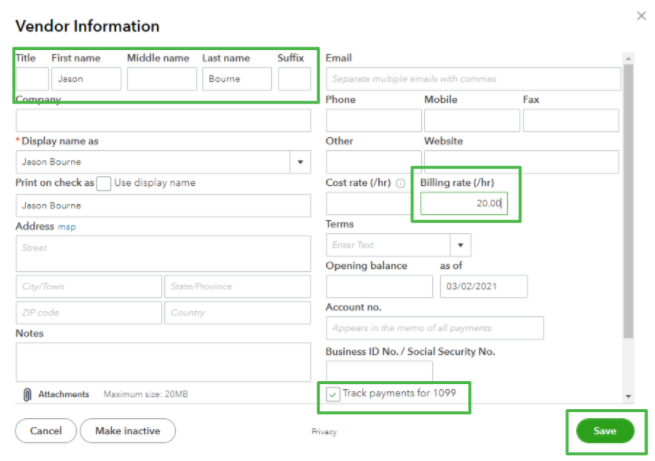
4. Enter the 1099 vendor information.
- Be careful when entering the name and correct billing rate/hour. Also, remember to mark “track payment for 1099.” Save the changes.
- You’ll find the 1099 in your vendor lists below.
It’s time to enable 1099 time tracking in Minute7. Here’s how:
1. Go to www.minute7.com and log in.
2. Go to “settings” and then “company settings.”
3. Scroll down to “enabled features.”
- Make sure option #2, “Enable time entries for Vendors,” is set to “yes.” If not, change it to “yes” and save changes.
4. Sync Minute7 with QuickBooks.
- Go to the “sync” tab, and click on the sync link.
5. Invite the new vendor to Minute7.
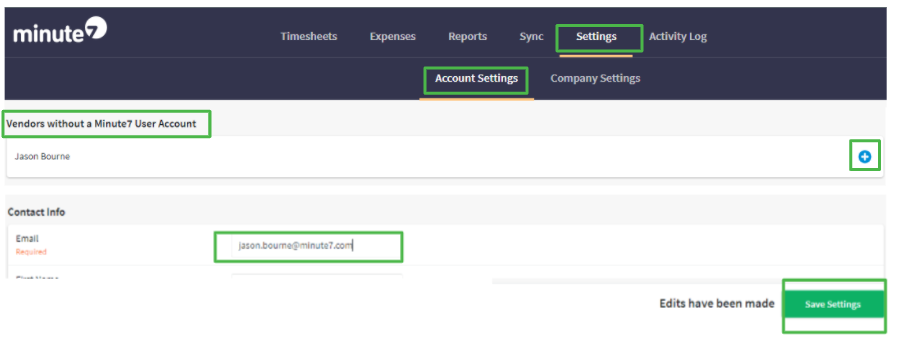
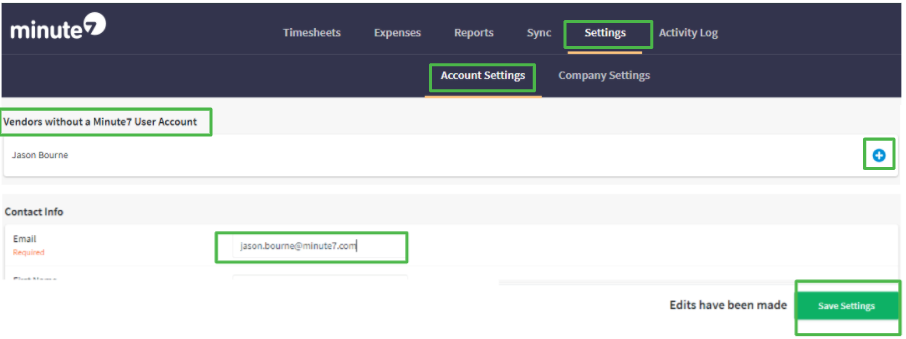
- Go to “Settings,” “account settings.” Scroll down to “vendors without a Minute7 account”. Click on the name of the vendor you just added.
- Enter the vendor’s email.
- Save changes. They will receive an email with all the setup information.
Congrats! You are now ready to track time for this vendor.
How to enter a 1099 vendor in QuickBooks desktop:
1. Login to your QuickBooks account.
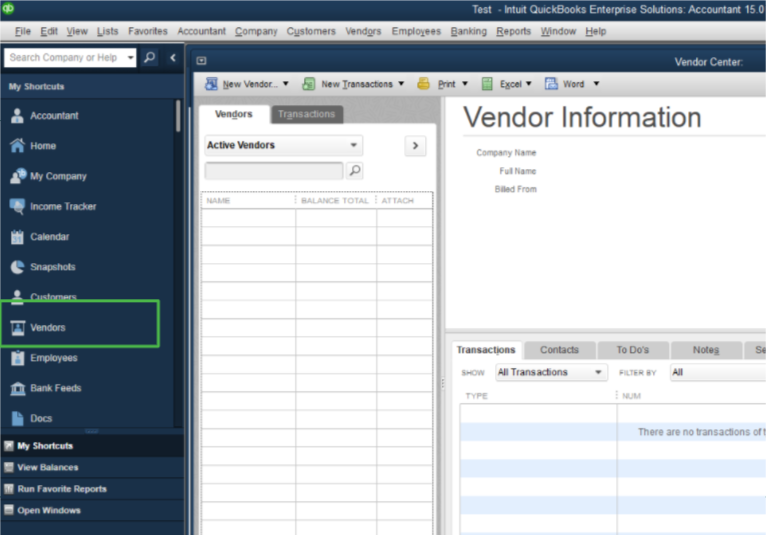
2. Go to the “Vendors” tab.
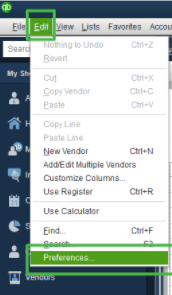
3. Click on “Edit” and then on “Preferences.”
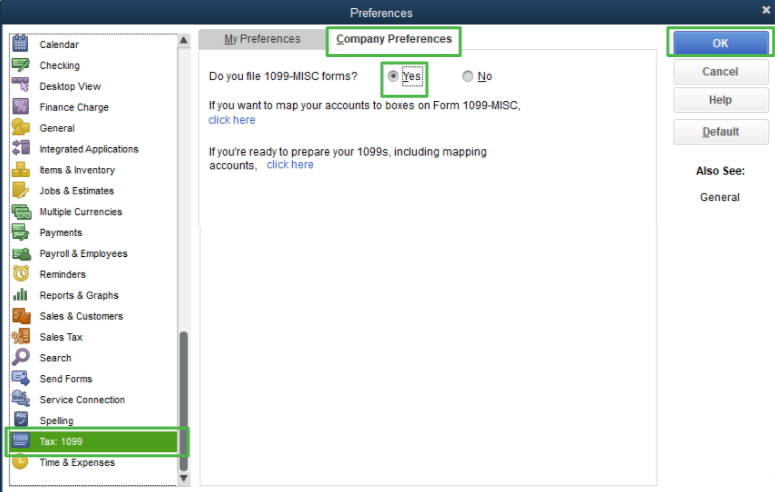
- Scroll down and click on “Tax: 1099.” Click on “Company Preferences” and mark “yes,” and click “ok.”
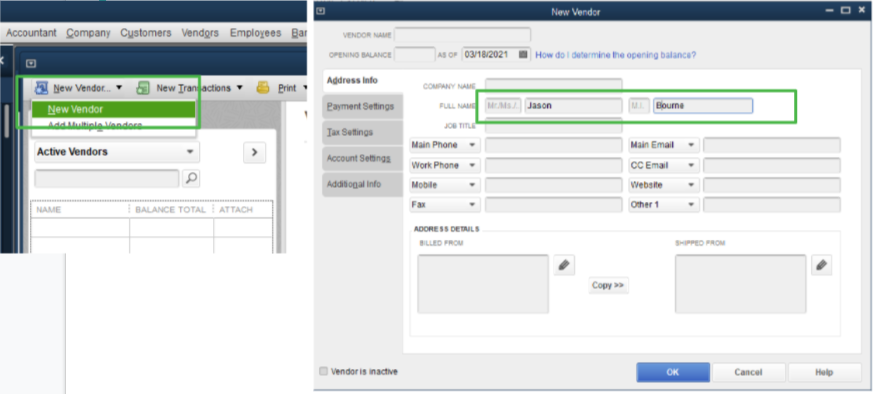
4. On the “vendors” tab, click on “New vendor,” and select the first option (new vendor).
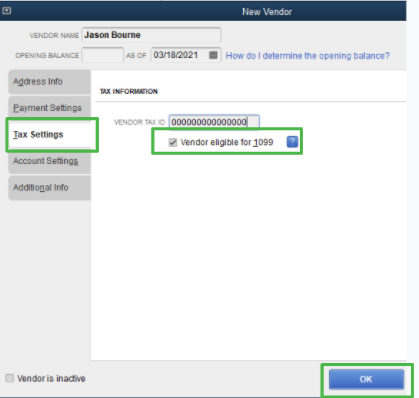
- Fill out the address info, set the tax settings (add the SSN if it’s personal, or the TIN if it’s an LLC), and check the box to make the vendor eligible for 1099. Click on “ok” to save the changes.
5. Sync with Minute7.
- You must have already synced the two apps. Here’s how to do it.
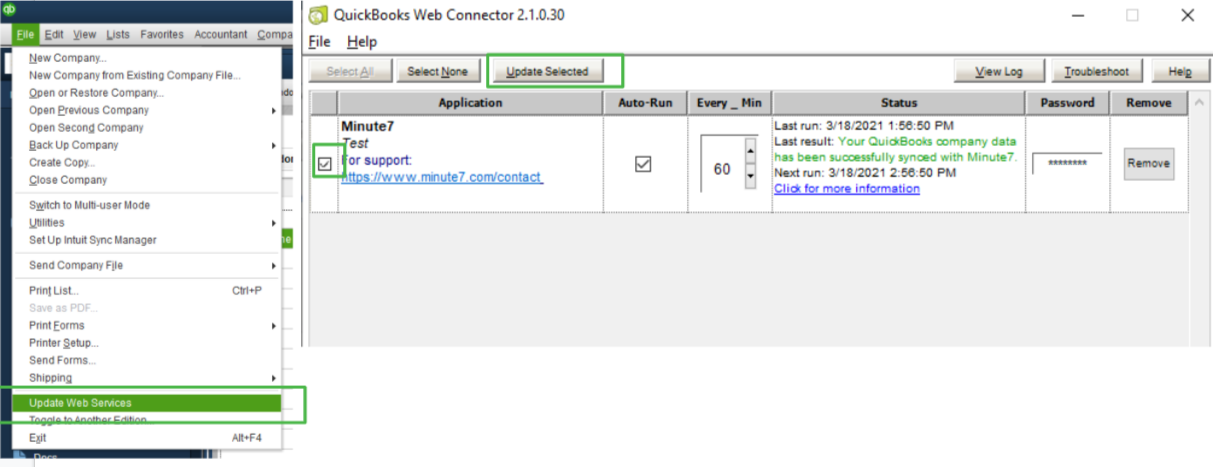
- Click on “File,” “Update web services,” tilt the first box and click on “update selected.”
It’s time to invite the 1099 vendor to Minute7. Here’s how:
1. Go to www.minute7.com and log in.
2. Scroll down to “enabled features.”
- Make sure option #2, “Enable time entries for Vendors,” is set to “yes.” If not, change it to “yes” and save changes.
3. Go to the “account settings” tab.
- Scroll down to “Vendors without a Minute7 account.” Click on the plus sign next to their name and add an email address for them.
4. Go to the “timesheets” tab, and start tracking time for them.
You’re all set up!
If you have any questions don’t hesitate to contact our customer support team at +1-858-736-9366 or support@minute7.com, we’ll be happy to assist you.


