
We get this question a lot! “How to assign and track time for classes in Minute7?”. Well, here’s the answer.
What are “classes”?
It’s just an additional way to associate or categorize time and expenses. The most common use is to categorize around lines of business and departments.
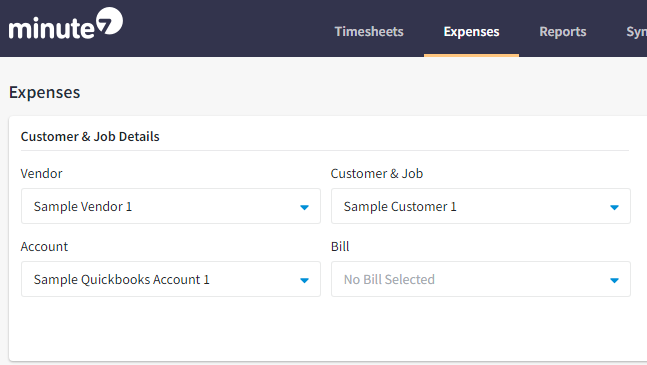
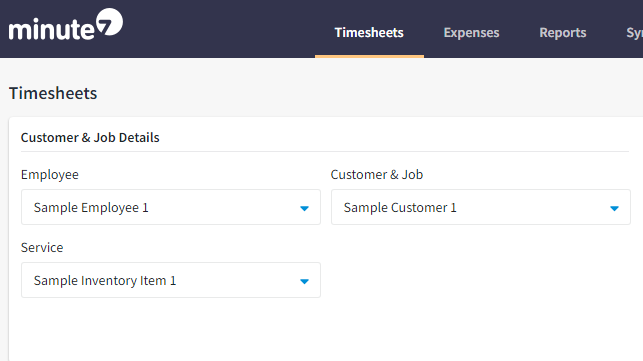
Once you activate this option, you’ll find a new drop-down menu available in your timesheets and expenses tab.
Before activating this option on Minute7, you need to set up classes in QuickBooks.
Here’s how to do it. (Skip this section if you already have classes assigned in QB)
Follow these steps if you use QuickBooks Online:
Step #1: Login into your QuickBooks Online account.
Step #2: Go to “Account and settings” by clicking on the gear button.
Step #3: Click on “advanced,” and scroll down to the category section.
Step #4: If class tracking is off. Click on the pencil icon in the “category” section to habilitate it.
Step #5: Add classes to the system by clicking on the gear button, and clicking on “all lists.”
Step #6: Click on “classes” to create the ones you need.
Step #7: Click on the “new” button. Enter a name for it, specify if it is a subclass, and save it. Create as many as you need.
Step #8: Sync with Minute7 and enable the possibility to track time and expenses linked to QuickBooks classes. Hand on, I’ll get there.
Click here to access our help aid with screenshots.
Follow these steps if you use QuickBooks Desktop:
For Windows:
Step #1: Login into your QuickBooks desktop account.
Step #2: Open your company file.
Step #3: Go to the “Edit” menu, then select “Preferences.”
Step #4: Select “Accounting,” then go to the “Company Preferences” tab.
Step #5: Select the Use class tracking for transactions checkbox.
Step #6: Select “OK.”
Step #7: Go to the “Lists” menu, then select “Class List.”
Step #8: From the Class drop-down menu, select “New.”
Step #9: Enter the class name. If it’s a subclass, select the “Subclass” of the checkbox and find the class it’s under.
Step #10: Select “OK” to add it.
For Mac:
Step #1: Login into your QuickBooks desktop account.
Step #2: Go to the QuickBooks menu, then select “Preferences.”
Step #3: In the “Workflow” section, select “Transactions.”
Step #4: Select the “Use class tracking” checkbox, then close the “Transactions” window to save the changes.
Step #5: Go to the “Lists” menu, then select “Classes.”
Step #6: Select the “plus (+) icon” to create a new class.
Step #7: Enter your preferred class name. To create a subclass, select the checkbox and the class it’s under.
Step #8: Select “OK” to create a class.
Once you’ve followed those steps, it’s time to move back to Minute7.
How to assign classes in Minute7?
Step #1: Login into your Minute7 account. Make sure you’re logged in as an account manager.
Step #2: Go to the “Settings” tab, and click on “Company settings.”
Step #3: Scroll down to the “Enable features” section. Make sure the 3rd option, “Allow users to assign QuickBooks classes to entries,” is set to “Yes,” and save settings.
Step #4: Go back to the “Timesheets tab.” You’ll find a third dropdown named “Classes.” Check if you also have it on the “Expenses tab.”
Step #5: Start tracking time and expenses for those classes.
Click here to access our help aid with screenshots.
Email us at support@minute7.com if you have any trouble.